 Shop UK Site

Colorful Cubes Investigation
- Gabrielle Fischer Posted On Jan 20, 2021 | Math
It can be tempting to think that scientific experiments are only for ‘big kids’, but I firmly believe that even toddlers and preschoolers can start to develop key science-based skills given the correct activity. This is one of our all-time favorite ways to enjoy a science experiment, and all you need is a few basic ingredients. Here are all the details for this fun colorful ice cubes experiment.
What you need for making the colorful ice cubes:
- Helping Hands Fine Motor Tool Set™
- Ice cube tray
- Bowl of water
- Kool-Aid, we used six different colors/flavors (this adds great colors… and lots of smells too!)
- Small pots or containers
- Toothpick or mini kebab stick for stirring
- Selection of sequins (glitter, beads, pom poms or even small toys will also work)
- Tray or container to help contain the mess

How to make the colorful ice cubes:
The great thing about this activity is that it naturally lends itself to so much fun sensory play, whilst also working your child’s fine motor skills hard. Start off by adding a little of each color Kool-Aid powder to your containers and then invite your child to squirt on some water with their Twisty Dropper™. My 3-year-old gave the cutest little gasp as she saw the water change color. She also loved that the Kool-Aid made ‘yummy smells’ as well. After she added water to each container she used a little kebab stick to give them all a good stir.


This is the point where we started to talk about the science experiment we were creating. I explained that she had made some lovely colored water and that water is a liquid. I asked her to predict what would happen if we put her colorful water in the freezer overnight. She told me that she thought the water would get very cold and freeze. This was a great start and led to us talking about the difference between the water which is a liquid, and ice which is a solid. It may seem like such a concept is too complex for your preschooler, but I’m a strong believer in the power of exposure. Just by involving my preschooler in the discussions, she is being exposed to the vocabulary and I am positively modeling interest and skills associated with science.
After our discussion, we transferred the colored water into an ice cube tray. This was another great way to get her hand muscles working. We were also able to link in some color mixing as she decided to invent a few new colors by mixing the ones from her containers. I always love watching children’s amazement when colors mix together to make new colors.


The final stage of making the colorful cubes was to add some sequins and confetti. This is optional of course, but it makes it really fun when the ice cubes melt because you can then try and rescue all of the runaway confetti. Once the ice cube tray was full of colorful and sparkly liquid, we put it in the freezer and left it to freeze overnight.


What you need for melting the colorful ice cubes:
- Helping Hands Fine Motor Tool Set™
- Colorful ice cubes frozen overnight
- A bowl of warm water
- Pot of salt
- Large bin or container

How to melt the colorful ice cubes:
Once you get the ice cubes out of the freezer tip them into a large bin and have the fine motor tools, warm water, and salt at the ready. Before you add anything to try and get the ice cubes to melt, take the opportunity to explore what has happened to the water overnight. A great way to do this is to use your senses. Ask your child what they can see has changed, and also how it feels different from before. Communicating their findings is a scientific skill within itself!


Now comes the fun… let’s get melting! Let your child add the salt and warm water using their hands and the fine motor tools. The Squeezy Tweezers™ were great for distributing the salt over the ice. I took the opportunity to explain why the salt helps to melt the ice while she played. Again, I’m not expecting her to learn these facts but just the exposure is a great start.


As the colorful cubes melted it was so neat to see the confetti coming loose and floating in the water. The colors also all started to mix in the bin. The Handy Scooper™ was such a fun tool for scooping up the cubes and water and watching it drip through, leaving the confetti inside the scooper.


The more warm water my preschooler added, the quicker the ice cubes melted. I asked her what she was noticing and she did a great job of using her senses to describe the changes. There was so much scientific vocabulary being used!
Wrapping up the investigation:
As with any science experiment, it is important to reflect on what we predicted would happen. We ran through the process of freezing the water so that it became a solid ice cube, and then how adding salt and warm water helped the solid to melt back into a liquid. So much learning in this fun hands-on sensory activity. We hope you give it a try too!

Valentine's Day Mathlink Cube Activities

Mathlink Cubes are perfect for creating fun and engaging Valentine's Day themed math activities. Additionally, Mathlink Cubes can be used to create patterns and sequences, such as making a pattern of hearts and counting the number of cubes used. These activities will help students practice their math skills in a fun and festive way.
Learn More
Mathlink Cubes are great for kids for several reasons:
- Hands-on learning: Mathlink Cubes are a hands-on learning tool that children can physically manipulate and explore mathematical concepts. This can help to make math more engaging and interactive for students.
- Multi-use: Mathlink Cubes can be used for various mathematical concepts, including counting, addition, subtraction, measurement, geometry, and more. This makes them a versatile and valuable tool for teachers and parents to have in their toolkits.
- Develops fine motor skills: Using the Mathlink Cubes requires children to use their fine motor skills, which can help to improve dexterity and hand-eye coordination.
- Concrete to abstract: Mathlink Cubes provide a concrete representation of mathematical concepts, which can help children to understand and internalize these concepts. Then the children can apply what they learned in the tangible form to more abstract problems.
- Fun and engaging: Mathlink Cubes come in different colors, making math activities fun and engaging for children. The fun and colorful aspect of the cubes makes children more excited to learn and practice math.
- Differentiation: Mathlink Cubes can be used to provide different levels of challenge for students, making it easy for teachers to differentiate instruction and provide support for students who need it.
Overall, Mathlink Cubes are an excellent tool for kids to learn and practice math in a fun and interactive way.
READ MORE

Mid-Summer Minicamp for Five-Year-Olds
Your soon-to-be-Kindergartener was built for summer! There’s so much to do, see, and explore, both inside and outdoors. If you’re looking for some fresh, fun ideas to help keep your rising Kindergartner engaged and learning for the rest of the summer, have we got the activities for you! Read on for three days’ worth of developmental, educational, and social-emotional activities – plus some bonus activities, just for fun. And don’t miss our summer minicamp activity ideas for three- and four-year-olds
Minicamp Day One:
Developmental Activity – Fine Motor Freezer Fun


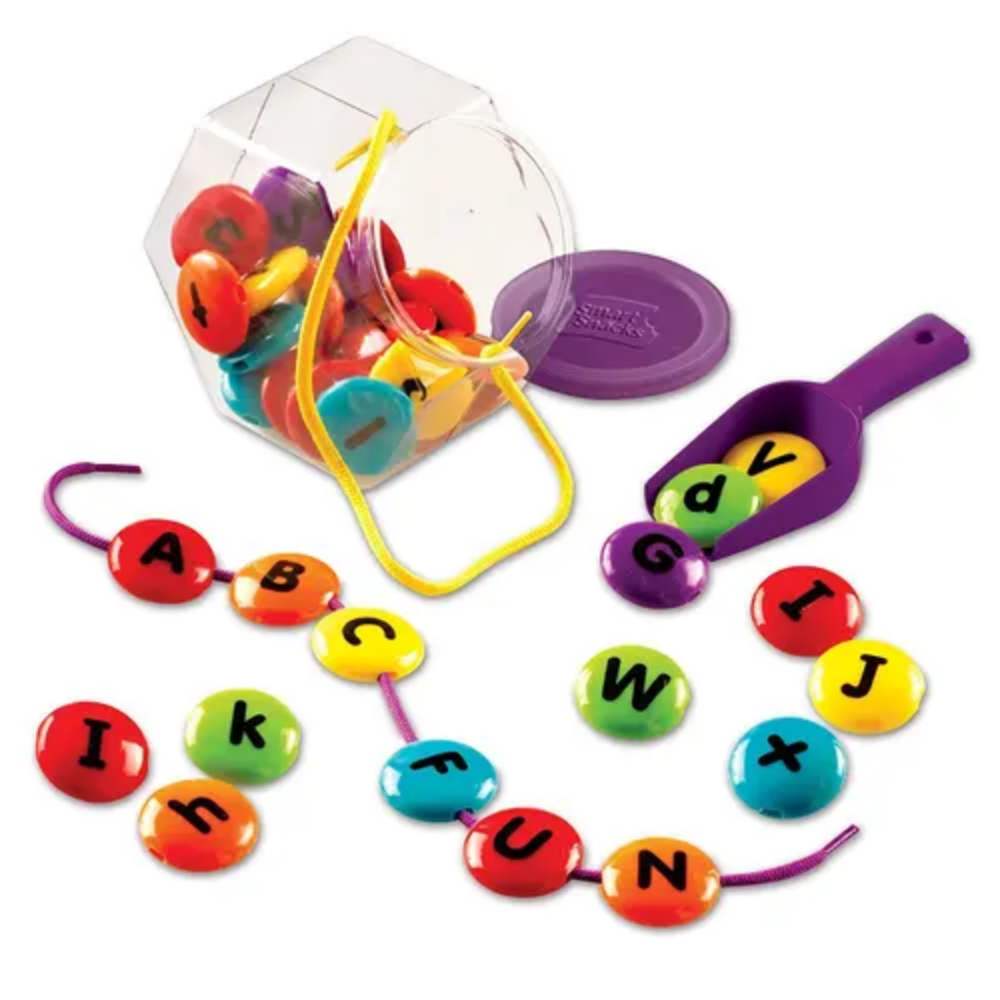
Kick off your first day of camp with some fine motor fun! Threading is an age-appropriate challenge for four-year-olds, resulting in a colorful creation they can wear or display. Set out some pipe cleaners and pony beads and thread a bracelet, create a beaded pattern for your preschooler to follow, or stick some spaghetti sticks into a ball of molding dough and thread penne noodles to make Stegosaurus. Find more threading ideas here.
Educational Activity – Learning You Can Count On

Download this free, printable worksheet, grab some counters, and practice numbers and counting with your kiddo! Count the letters in their name (writing it out on a sheet of paper might help), their age, the number of siblings they have, and more!
Social Emotional Learning Activity – Paint a Rock

You may have seen the pretty, painted rocks people are leaving around neighborhoods across the country as a symbol of kindness. You can do the same! Take a walk and find some medium-sized rocks with nice flat or rounded surfaces. Clean them off and pop them in the oven at 350 for 15 minutes – you can use the time to talk about things that make your kids happy as inspiration for what they might draw. Let the rocks cool just a bit, then use crayons to draw their ideas! When the rocks are dry, use a Sharpie to write caring messages like “Kindness”, “Love”, or “Joy”. Then place them in your neighbors’ gardens to brighten up their days! Find other kindness activities here.
✨ Bonus Activity – Cool Down with a DIY Snowstorm ✨
End your first day of minicamp with another cool-down activity – making a snowstorm in a bottle! Gather a glass or see-through plastic jar, vegetable oil, white paint, glitter, and an Alka-Seltzer tab, and follow these instructions to make it snow inside!
Minicamp Day Two:
Developmental Activity – Get a Grip


Using the proper pencil grip is the key to legible writing. Help your kiddo practice this summer by providing a sheet of properly formed capital letters to trace using a variety of differently sized crayons, markers, and pencils. Around age five, kids should be able to manipulate a writing utensil with three fingers rather than move their wrists or arms. Learn more about proper pencil grasps here.
Educational Activity – Go on a Math Scavenger Hunt

Brush up on those math skills with a scavenger hunt around the house! Print this list of things to look for and set off to find everyday math items, including number words, items of certain sizes and shapes, pairs of things, and more!
Social Emotional Learning Activity – Create a Gratitude Wall

Playing school is a wonderful way to build your child’s creativity and imagination. It also allows your soon-to-be-scholar to mentally prepare for going to school and build the confidence they’ll need to thrive there. Set up some school-ish materials, like a chalkboard or easel, books, paper and crayons, and stickers, and follow your little one’s lead. Will they read to their stuffed animals? Teach you letters and numbers? Draw a picture?
✨ Bonus Activity – Build a Fort ✨
Nothing is nicer after a day of summer minicamp than a delicious popsicle! Follow our favorite recipe for fruit and veggie pops, working together to squeeze the lime, drop the ingredients into the blender, stir the elements, and insert the popsicle handles. Talk about the foods as you work with them – what color are they? What is their texture like? What letter does that food start with? How might it taste?
Minicamp Day Three:
Developmental Activity – Brew a Batch of Slime


Stretchy, sticky, and squishy, you probably know that slime is awesome. But did you know that slime also helps builds fine motor skills? Measuring, pouring, mixing, stirring, squeezing, smashing, rolling, and twisting are all great ways to strengthen hand muscles and build fine motor skills! Start your last day of minicamp off with some slime, using our favorite recipe.
Educational Activity – Print Letters in Playdough


Practice letter identification, letter sounds, and word building with this simple stamp-and-learn activity! Set out some molding dough (or make your own – another fun minicamp activity!), tools like plastic rolling pins, cutters, kid-safe scissors, and letter blocks or magnets. Then show your child how to flatten the dough and stamp a letter into it. Say the letter name as they stamp, make its sound, and say a word that starts with that letter. See if your child can find the letters in their name and stamp them all in a row.
Social Emotional Learning Activity – Have Fun with Physics

The forces of physics are all around us, and summer is a great time to see them in action. Floating in the pool, rolling a ball, and dropping an ice cream cone (oh NO!) are perfect examples of buoyancy, motion, and gravity. These simple activities will demonstrate some of the most fundamental properties of physics in a fun way – and you can follow up your lesson by making a simple machine (instructions included).
✨ Bonus Activity – Job Talk ✨
Print this free career worksheet, cut out the word cards and images, and match them up! Talk about each job, the responsibilities of each job, the qualities each requires, and which one interests your child the most (and the least).
READ MORE

Mid-Summer Minicamp for Four-Year-Olds
Summer marches on, and many families are ready for some fresh new activity ideas to keep their kids engaged and learning. To help liven things up – and prepare your four-year-old to start preschool in the fall – we’re sharing three days’ worth of unplugged developmental, educational, and social-emotional learning activities designed specifically for preschoolers (click for minicamps for three- and five-year-olds, too). Check out these fun ideas, starting with:
Minicamp Day One:
Developmental Activity – Find a Common Thread


Kick off your first day of camp with some fine motor fun! Threading is an age-appropriate challenge for four-year-olds, resulting in a colorful creation they can wear or display. Set out some pipe cleaners and pony beads and thread a bracelet, create a beaded pattern for your preschooler to follow, or stick some spaghetti sticks into a ball of molding dough and thread penne noodles to make Stegosaurus. Find more threading ideas here.
Educational Activity – Make an Ice Balloon


Shift from motor skills to a letter learning deep dive with this fun underwater activity (also great for bathtime!). Fill a bin with bubbly water, add a plastic scooper or cup, tongs, plastic tweezers, a whisk, and a clean dish scrubber, then drop in some plastic letters or letter magnets. Say the name of each letter as your child extracts it, make its sound, and say a few words that start with that sound. Find step-by-step instructions here.
Social Emotional Learning Activity – Explore Big Feelings


Solid social-emotional skills are a must for preschool. This free, downloadable, matching worksheet will help your little one learn to recognize emotions, from silly to sad to calm and nervous. Then talk about the feelings that go with each face, whether your child has ever felt that feeling, and what they might do to help a friend who’s feeling the same.
✨ Bonus Activity – Feeding at the Farm ✨
If your camper can’t get enough animals, they’ll love this fun-on-the-farm activity! Set out a few plastic bowls filled with animal “food” (think oats, dry pasta, chickpeas, and nuts), then let your little one use a spoon to fill cupcake liner “troughs.” Place the troughs on a play tray and your plastic farm animal figurines, and watch the pretend play unfold!
Minicamp Day Two:
Developmental Activity – Set Up an Apple Sensory Bin
Nothing says summer quite like apple pie! Kick off day two of minicamp with a sensory stimulating activity bin full of oats, play apples (or red, green, and yellow pom poms), scoopers, sifters, tongs, cups, and spoons, and let your little learner loose. Sorting and matching by color and size is a key foundational math skill, and manipulating the tools in the bin builds fine motor skills. Find more ways to play here.
Educational Activity – Explore Animal Habitats


This hands-on habitat activity lets kids learn about different animals and their various environments! Start by asking your child to choose a favorite animal figure. Talk about where that animal might live, what they might eat, and what you’ll need to create the perfect habitat. Take a walk around the house, out back, and to the park to collect these items, then build your habitats using a shoebox or Tupperware container, dirt, sand, rice, pebbles, bark, twigs, beads, marbles, etc.
Social Emotional Learning Activity – Play School


Playing school is a wonderful way to build your child’s creativity and imagination. It also allows your soon-to-be-scholar to mentally prepare for going to school and build the confidence they’ll need to thrive there. Set up some school-ish materials, like a chalkboard or easel, books, paper and crayons, and stickers, and follow your little one’s lead. Will they read to their stuffed animals? Teach you letters and numbers? Draw a picture?
✨ Bonus Activity – Make Hidden Veggie Popsicles ✨
Nothing is nicer after a day of summer minicamp than a delicious popsicle! Follow our favorite recipe for fruit and veggie pops, working together to squeeze the lime, drop the ingredients into the blender, stir the elements, and insert the popsicle handles. Talk about the foods as you work with them – what color are they? What is their texture like? What letter does that food start with? How might it taste?
Minicamp Day Three:
Developmental Activity – Have Some Fantastical Fine Motor Fun


Day three of your minicamp will be fantastic, thanks to our printable preschool worksheets! Build hand strength, graphomotor skills, hand-eye coordination, and more with a pack of free, fantastical preschool printables, including color by numbers unicorn, a mystery maze, and a coloring sheet. Then practice cutting with kid-safe scissors to create pretend play unicorn and dragon masks.
Educational Activity – Print Letters in Playdough
Practice letter identification, letter sounds, and word building with this simple stamp-and-learn activity! Set out some molding dough (or make your own – another fun minicamp activity!), tools like plastic rolling pins, cutters, kid-safe scissors, and letter blocks or magnets. Then show your child how to flatten the dough and stamp a letter into it. Say the letter name as they stamp, make its sound, and say a word that starts with that letter. See if your child can find the letters in their name and stamp them all in a row.
Social Emotional Learning Activity – Practice Kindness


Knowing other people’s feelings and doing what you can to help are two hugely important SEL skills. Put your playdough letter practice to good use by thinking of a friend or family member who might enjoy receiving a picture or letter from your child in the mail, then make one! Help your little one write a simple message, draw or paint an image to go with it, address an envelope, insert their work, and let your sweetie apply the stamp. Walk the letter to the mailbox, and off it goes! Find other ways to practice everyday kindness here.
✨ Bonus Activity – DIY Terrarium ✨
Are you tired of the summer heat? Make your rain cloud out of shaving cream and food coloring! Drop food coloring, one color at a time, onto a clear glass of water topped with shaving cream until the cream “cloud” becomes saturated enough to rain – just like real clouds! Then watch as a rainbow of colors is released from the bottom of the cloud into the water. Find step-by-step instructions for making your rainbow cloud here.
READ MORE


