This is a demo store. No orders will be fulfilled.

Winter Boredom Busters

Wrapping Up Your Holidays: Crafty Ways to Re-Work Gift Wrap

This is the time of year to be grateful, not wasteful. Used wrapping paper can tend to pile up during this special season of gift giving. Who amongst us hasn’t looked at a trash bag full of giftwrap and shook their head? There’s got to be a better use for all the paper, right? Below are a few clever ideas to get the kids involved in upcycling used gift wrap.

MYOB: Make Your Own Bunting. A delightful holiday design trend for several years now, bunting can be placed around the house to spruce up your season. Cut up your old wrapping paper in triangles using a template, tape it to a string, and have the kids come up with clever phrases, adding some deck to your halls.

Insist Your Toddler Cut Corners. For the toddler set, a whopping pile of paper and a pair of safety scissors is like heaven on Earth. Getting your preschooler practicing this important fine motor skill with all your leftover gift wrap. The paper is thinner, which might spark some cutting confidence. Pile it all up in a sensory bin and let them have at it!

A Little “Thank You” Goes a Long Way. So many presents, so many people to thank! Utilize the season’s remaining wrapping paper by having your kids fashion the cutest homemade thank you cards. This is a great busy activity in the dog days of winter break (you’ll thank us later).

A Place (setting) for Everything… Upcycle wrapping paper to create festive placemats for your holiday table. Not only will your tablescape showcase some extra holiday cheer, clean up will be a snap!

Winter Break Weaving. Paper weaving is a fun activity suitable for many age levels. Shred your remaining wrapping paper into strips. Using an x-acto knife, cut slits into construction paper. Be sure to do this step over an old magazine or cardboard. Weave the strips in and out of the slits. Use the creation for thank you cards, decoration, placemats, or anything where around the house that could use a little extra holiday style.

Wrapping Up Your Holidays: Crafty Ways to Re-Work Gift Wrap

This is the time of year to be grateful, not wasteful. Used wrapping paper can tend to pile up during this special season of gift giving. Who amongst us hasn’t looked at a trash bag full of giftwrap and shook their head? There’s got to be a better use for all the paper, right? Below are a few clever ideas to get the kids involved in upcycling used gift wrap.

MYOB: Make Your Own Bunting. A delightful holiday design trend for several years now, bunting can be placed around the house to spruce up your season. Cut up your old wrapping paper in triangles using a template, tape it to a string, and have the kids come up with clever phrases, adding some deck to your halls.
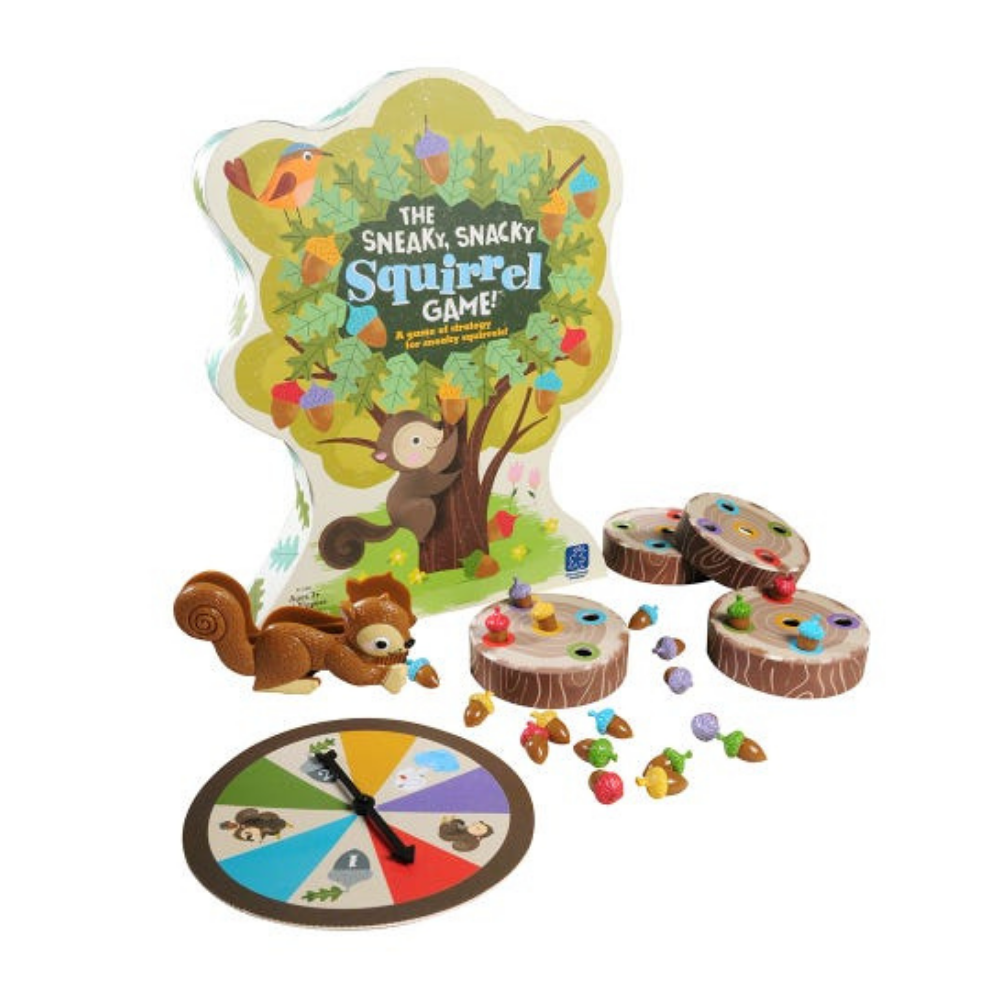
Insist Your Toddler Cut Corners. For the toddler set, a whopping pile of paper and a pair of safety scissors is like heaven on Earth. Getting your preschooler practicing this important fine motor skill with all your leftover gift wrap. The paper is thinner, which might spark some cutting confidence. Pile it all up in a sensory bin and let them have at it!

A Little “Thank You” Goes a Long Way. So many presents, so many people to thank! Utilize the season’s remaining wrapping paper by having your kids fashion the cutest homemade thank you cards. This is a great busy activity in the dog days of winter break (you’ll thank us later).

A Place (setting) for Everything… Upcycle wrapping paper to create festive placemats for your holiday table. Not only will your tablescape showcase some extra holiday cheer, clean up will be a snap!

Winter Break Weaving. Paper weaving is a fun activity suitable for many age levels. Shred your remaining wrapping paper into strips. Using an x-acto knife, cut slits into construction paper. Be sure to do this step over an old magazine or cardboard. Weave the strips in and out of the slits. Use the creation for thank you cards, decoration, placemats, or anything where around the house that could use a little extra holiday style.

READ MORE

‘Tis the Season – for STEM!

Exercise Those Engineering Skills This Winter 

Hooray! The holidays are here! Time for snuggly sweaters, snowy sleigh rides, hot apple cider, and… STEM? Yes! Winter break is a great time to slip in some STEM learning and the Learning Resources Playground Engineering & Design Building Set is a great way to do it!

First, a quick refresher on STEM.

STEM is simply a nationwide push to put more emphasis on science, technology, engineering, and math in schools, to better prepare our kids for careers in these fields in the future. By exploring these subjects at home, in a playful, low-stress way, you’ll ignite your kids’ curiosity, fuel creative thinking, and problem-solving, and inspire confidence that will carry through to school and support what your kids are learning there.
So, what are you waiting for?

Pour a cup of cocoa, call the kids to the table, and get ready to build your own polar playground!

Open the box, and you’ll find lots of packaged parts and pieces, as well as a set of double-sided instruction cards and a little workbook. Start by unpacking all the pieces in groups and checking out the different playground equipment you and your kids can engineer! You’ll find posts, platforms, gears, connectors, and more – everything you’ll need to design your own simple machines!

Next, choose a card and review the pieces you’ll need to build that structure. Work together to gather them and set them aside. Then follow the photos on the cards to assemble the structure, piece by piece. Once it’s finished, test it out by placing one of the included figures inside.

Now, flip the card to find a building challenge related to that structure. This is a great time to introduce the engineering design process – you know, ask, imagine, plan, create, and improve. Let your little one take the lead on solving the problems on the back of each card – you’ll be impressed with their creative solutions!

Take your time building the different playground pieces. Talk about the process and share some of the science behind the fun. Gravity draws the figure down the inclined slide. Momentum keeps the merry-go-round spinning. You get the idea.

When you’re done with building fun, it’s time to get creative with some playground pretend play! Your kids will love walking the included figures through the playground and helping them try out each piece of equipment.

Building sets like the Playground Engineering & Design Building Set are a great way to engineer some serious STEM skills and to spend a snowy afternoon together.

In fact, there are lots of playful ways to help your kids love learning and develop the skills they need for success. Work a holiday-themed puzzle, dissolve a candy cane, freeze and melt colored ice cubes… There are always ways to learn where you play – especially during the holidays!

Read more

‘Tis the Season – for STEM!

Exercise Those Engineering Skills This Winter 

Hooray! The holidays are here! Time for snuggly sweaters, snowy sleigh rides, hot apple cider, and… STEM? Yes! Winter break is a great time to slip in some STEM learning and the Learning Resources Playground Engineering & Design Building Set is a great way to do it!

First, a quick refresher on STEM.

STEM is simply a nationwide push to put more emphasis on science, technology, engineering, and math in schools, to better prepare our kids for careers in these fields in the future. By exploring these subjects at home, in a playful, low-stress way, you’ll ignite your kids’ curiosity, fuel creative thinking, and problem-solving, and inspire confidence that will carry through to school and support what your kids are learning there.
So, what are you waiting for?

Pour a cup of cocoa, call the kids to the table, and get ready to build your own polar playground!

Open the box, and you’ll find lots of packaged parts and pieces, as well as a set of double-sided instruction cards and a little workbook. Start by unpacking all the pieces in groups and checking out the different playground equipment you and your kids can engineer! You’ll find posts, platforms, gears, connectors, and more – everything you’ll need to design your own simple machines!

Next, choose a card and review the pieces you’ll need to build that structure. Work together to gather them and set them aside. Then follow the photos on the cards to assemble the structure, piece by piece. Once it’s finished, test it out by placing one of the included figures inside.

Now, flip the card to find a building challenge related to that structure. This is a great time to introduce the engineering design process – you know, ask, imagine, plan, create, and improve. Let your little one take the lead on solving the problems on the back of each card – you’ll be impressed with their creative solutions!

Take your time building the different playground pieces. Talk about the process and share some of the science behind the fun. Gravity draws the figure down the inclined slide. Momentum keeps the merry-go-round spinning. You get the idea.

When you’re done with building fun, it’s time to get creative with some playground pretend play! Your kids will love walking the included figures through the playground and helping them try out each piece of equipment.

Building sets like the Playground Engineering & Design Building Set are a great way to engineer some serious STEM skills and to spend a snowy afternoon together.

In fact, there are lots of playful ways to help your kids love learning and develop the skills they need for success. Work a holiday-themed puzzle, dissolve a candy cane, freeze and melt colored ice cubes… There are always ways to learn where you play – especially during the holidays!

READ MORE

Kids' Table: STEM Structures!

The kids’ table is THE place to be this holiday. Allow time for the adults to enjoy seconds at the big table by breaking out some STEM fun with the kids. Mini marshmallow and gumdrop structures are this holiday’s time enhancer–and it couldn’t be easier!

Simple setup + simple materials = BIG scientific impact


You will need:

  • Lots of toothpicks
  • Gumdrops
  • Mini marshmallows

Without realizing it, your kids (and kid guests) will begin to think like engineers who are facing a two-part challenge:

What to make?

How to improve on what you’ve already made?

Begin by challenging kids to create simple structures, like shapes. Try octagons, triangles, ladders, etc. Will these serve as building blocks to something more three-dimensional?

Without the children realizing it, building these gumdrops and marshmallow shapes is a unique way to practice fine motor skills. Dexterity, grasp, and coordination are necessary to construct up, up, up – no matter the age!

Next, watch kids as they critically examine how to improve upon what they’ve already created. What step is needed to take it (literally) to the next level?

What about the structural composition of the connectors? As the kids begin to build, are the marshmallows easier to stab with the toothpick? Which seems to keep your three-dimensional shapes in place better?

As they build, remind children that failure is definitely an option, here. That your shape may shift and your tower may topple! The attempt to rebuild by lessons from their first misstep is just as important of a takeaway.

Lastly–and most delightful to watch as parents–might be the natural drive for table collaboration. “If we attach our structures together, it will be even bigger and better and more interesting!

The possibilities are endless (and so are the fun and laughs!). 

Season’s Greetings from Learning Resources!

READ MORE

Holiday Tinker Box

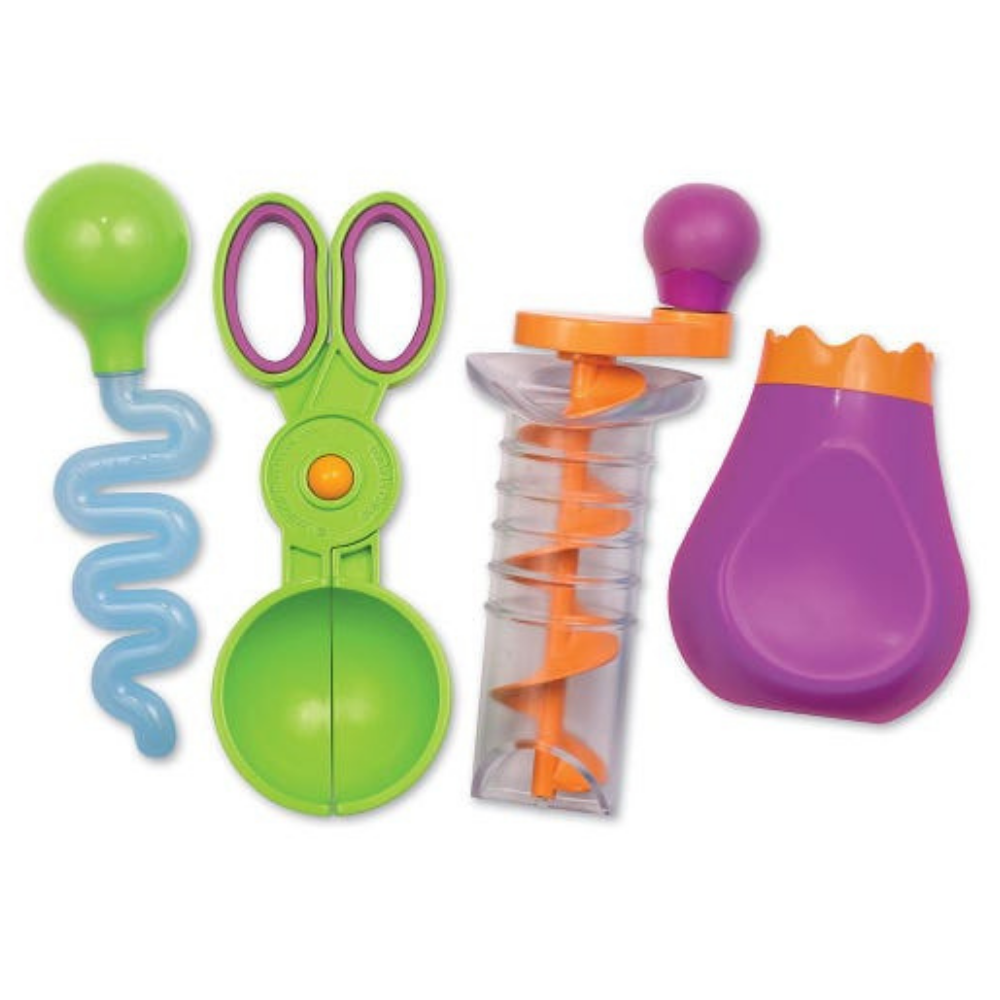
There are so many fun new materials for little hands to explore at this time of year. One of my favorite quick-to-set-up activities is to provide my preschooler with a selection of festive loose parts, a few containers or cups, and some Learning Resources, Fine Motor Tools. The freedom to explore in her way always inspires so much creative play.

Materials needed:

The Set-Up

This couldn’t be any easier to set up; simply put the materials and fine motor tools in the container! I chose to color code the loose parts and containers as an added sorting element to the tinker box. It is worth noting that, of course, if your little one still mouths items, then avoid any small loose parts in your tinker box as they could be a choking hazard. 

How the Activity Works

Tinker boxes or trays are simply an open-ended selection of materials that encourage your child to experiment and explore. There is no expected outcome or a particular way to play with the materials. Instead, the focus is more on your child having the opportunity to use each material however they wish. The really interesting thing is to see how your child combines the materials and uses them to drive their play.

When my 3-year-old opened the box, she gave the cutest little gasp. She was so excited to get her hands on all these loose parts without any restrictions.

Straight away, she set up some of the cups and started transferring materials. Moving the bells from one place to another may not seem like learning, but so many skills are being developed here.

She was working on her fine motor skills each time she moved a bell and used her senses to explore the materials and then develop a vocabulary to express what she was experiencing.

Adding fine motor tools to a setup like this helps extend the play by adding a different element of challenge. My little one experimented with if she could pick up the various loose parts with each tool. This offered an opportunity for some problem-solving. 

For example, the presents were too big to fit inside the Squeezy Tweezers, so she had to switch to using the Jumbo Tweezers. She also realized after a while that she could fit more than one bell inside the Squeezy Tweezers, which made filling the cups with bells much faster!

Due to the fact that the set contained only three colors- red, green, and gold, there was lots of focused color sorting. This led in turn to an excellent opportunity to work on some counting skills.

As she filled the cupcake liners and cups, she would count the items in. She also then spent time comparing the group sizes of each color. This is such a great early numeracy link as phrases like bigger and smaller and more than and less than were often used.

Have you ever tried using a tinker box with your child? It’s so fascinating to see how they use the materials and combine them with their imaginative play ideas. Using Learning Resources fine motor tools is a great way to extend the play and add an extra challenge to transferring the materials. So much open-ended fun!

READ MORE
Color by Number Winter Scene Printable
READ MORE
Winter Boredom Buster: DIY Fake Snow!
Whether you live in a climate where blizzards are common, or those little white flakes are rarely in your forecast, snow and all it entails is a holiday dream for all little minds.
READ MORE
Winter Sensory Exploration
READ MORE

Holiday Light Patterns Printable!

What color light comes next in the pattern? Cut out the lights and put them in the correct box!

Print the Activity!

Holiday Light Patterns Printable!

What color light comes next in the pattern? Cut out the lights and put them in the correct box!

Print the Activity!

READ MORE

Holiday Loose Part Bucket Balance!

Looking for a low-prep, low-pressure way for your toddler or preschooler to explore holiday items independently but with a STEM twist? Enter this holiday loose parts bucket balance play invitation! 

Materials we used:

Setup:

To create an engaging, open-ended invitation to play, we set up the Bucket Balance with various small loose parts arranged in front of it and hidden inside its storage drawer. We chose a Hanukkah theme for this particular setup, but in the future, we might try other themed loose parts, such as:

  • Christmas: jingle bells, small ornaments, mini candy canes, etc.
  • Winter: pine cones, acorns, snowflake-shaped beads, Arctic animal figurines, etc.
  • Nature: small stones, seashells, tree bark, pinecones, etc.
  • Snacktime: Animal crackers, goldfish, carrot sticks, cereal, etc.
  • Random: tiny cars, small blocks, wooden beads,  -- the sky is the limit! You know your child best -- choose items that will excite and delight!  

Play & Learn:

This activity allows young children to freely explore and sort various small parts, including textures, ​​colors, and quantity. Adding in the Bucket Balance invites them to compare these items with new measurement concepts like weight, mass, and volume. 

After some free-play, caregivers can lean in and prompt additional curiosity by asking questions about the various loose parts. For instance: How many gelt coins might you need to balance both buckets? Which is heavier, X number of candles or X number of dreidels? Let's count them together and see if our hypothesis is correct!

This is a fun new way to get festive and keep those curious brains active during breaks from preschool! What items would your child enjoy comparing on a Bucket Balance?


About the Author, Sarah Yale: With a background in education, youth development, and restorative justice, Sarah Yale wears many hats, including Mom and Librarian. She endeavors to combine her love of children's books and the great outdoors to plan inclusive, play-based activities that foster curiosity and social-emotional learning. An advocate for literacy development, loose parts, and sensory play, Sarah's activities invite you to lean in, read up, and get messy together! See more of her ideas on Instagram at @staycurious_sadertot. 

READ MORE